How to manage schema changes in a team
Introduction
When working in a team, managing database schema changes can be challenging. This guide shows you how to effectively collaborate on schema changes using Prisma Migrate, ensuring that all team members can safely contribute to and incorporate schema changes.
Prerequisites
Before starting this guide, make sure you have:
- Node.js installed (version 18 or higher)
- A Prisma project set up with migrations
- A relational database (PostgreSQL, MySQL, SQLite, SQL Server, etc.)
- Basic understanding of Git
- Basic familiarity with Prisma Migrate
1. Understand migration basics
1.1. Migration order
Migrations are applied in the same order as they were created. The creation date is part of the migration subfolder name - for example, 20210316081837-updated-fields was created on 2021-03-16-08:18:37.
1.2. Source control requirements
You should commit the following files to source control:
- The contents of the
.prisma/migrationsfolder, including themigration_lock.tomlfile - The Prisma Schema (
schema.prisma)
Source-controlling the schema.prisma file is not enough - you must include your migration history because:
- Customized migrations contain information that cannot be represented in the Prisma schema
- The
prisma migrate deploycommand only runs migration files
2. Incorporate team changes
2.1. Pull latest changes
To incorporate changes from collaborators:
- Pull the changed Prisma schema and
./prisma/migrationsfolder - Run the migrate command:
npx prisma migrate dev
2.2. Example scenario
Let's walk through a sample scenario with three developers sharing schema changes:
- Before
- After
model Post {
  id        Int     @id @default(autoincrement())
  title     String
  content   String?
  published Boolean @default(false)
  author    User?   @relation(fields: [authorId], references: [id])
  authorId  Int?
}

model User {
  id    Int     @id @default(autoincrement())
  email String  @unique
  name  String?
  posts Post[]
}
model Post {
  id        Int     @id @default(autoincrement())
  title     String
  content   String?
  published Boolean @default(false)
  author    User?   @relation(fields: [authorId], references: [id])
  authorId  Int?
}

model User {
  id              Int     @id @default(autoincrement())
  email           String  @unique
  name            String?
  favoriteColor   String? // Added by Ania
  bestPacmanScore Int? // Added by you
  posts           Post[]
}

// Added by Javier
model Tag {
  tagName     String   @id
  tagCategory Category
}
3. Handle concurrent changes
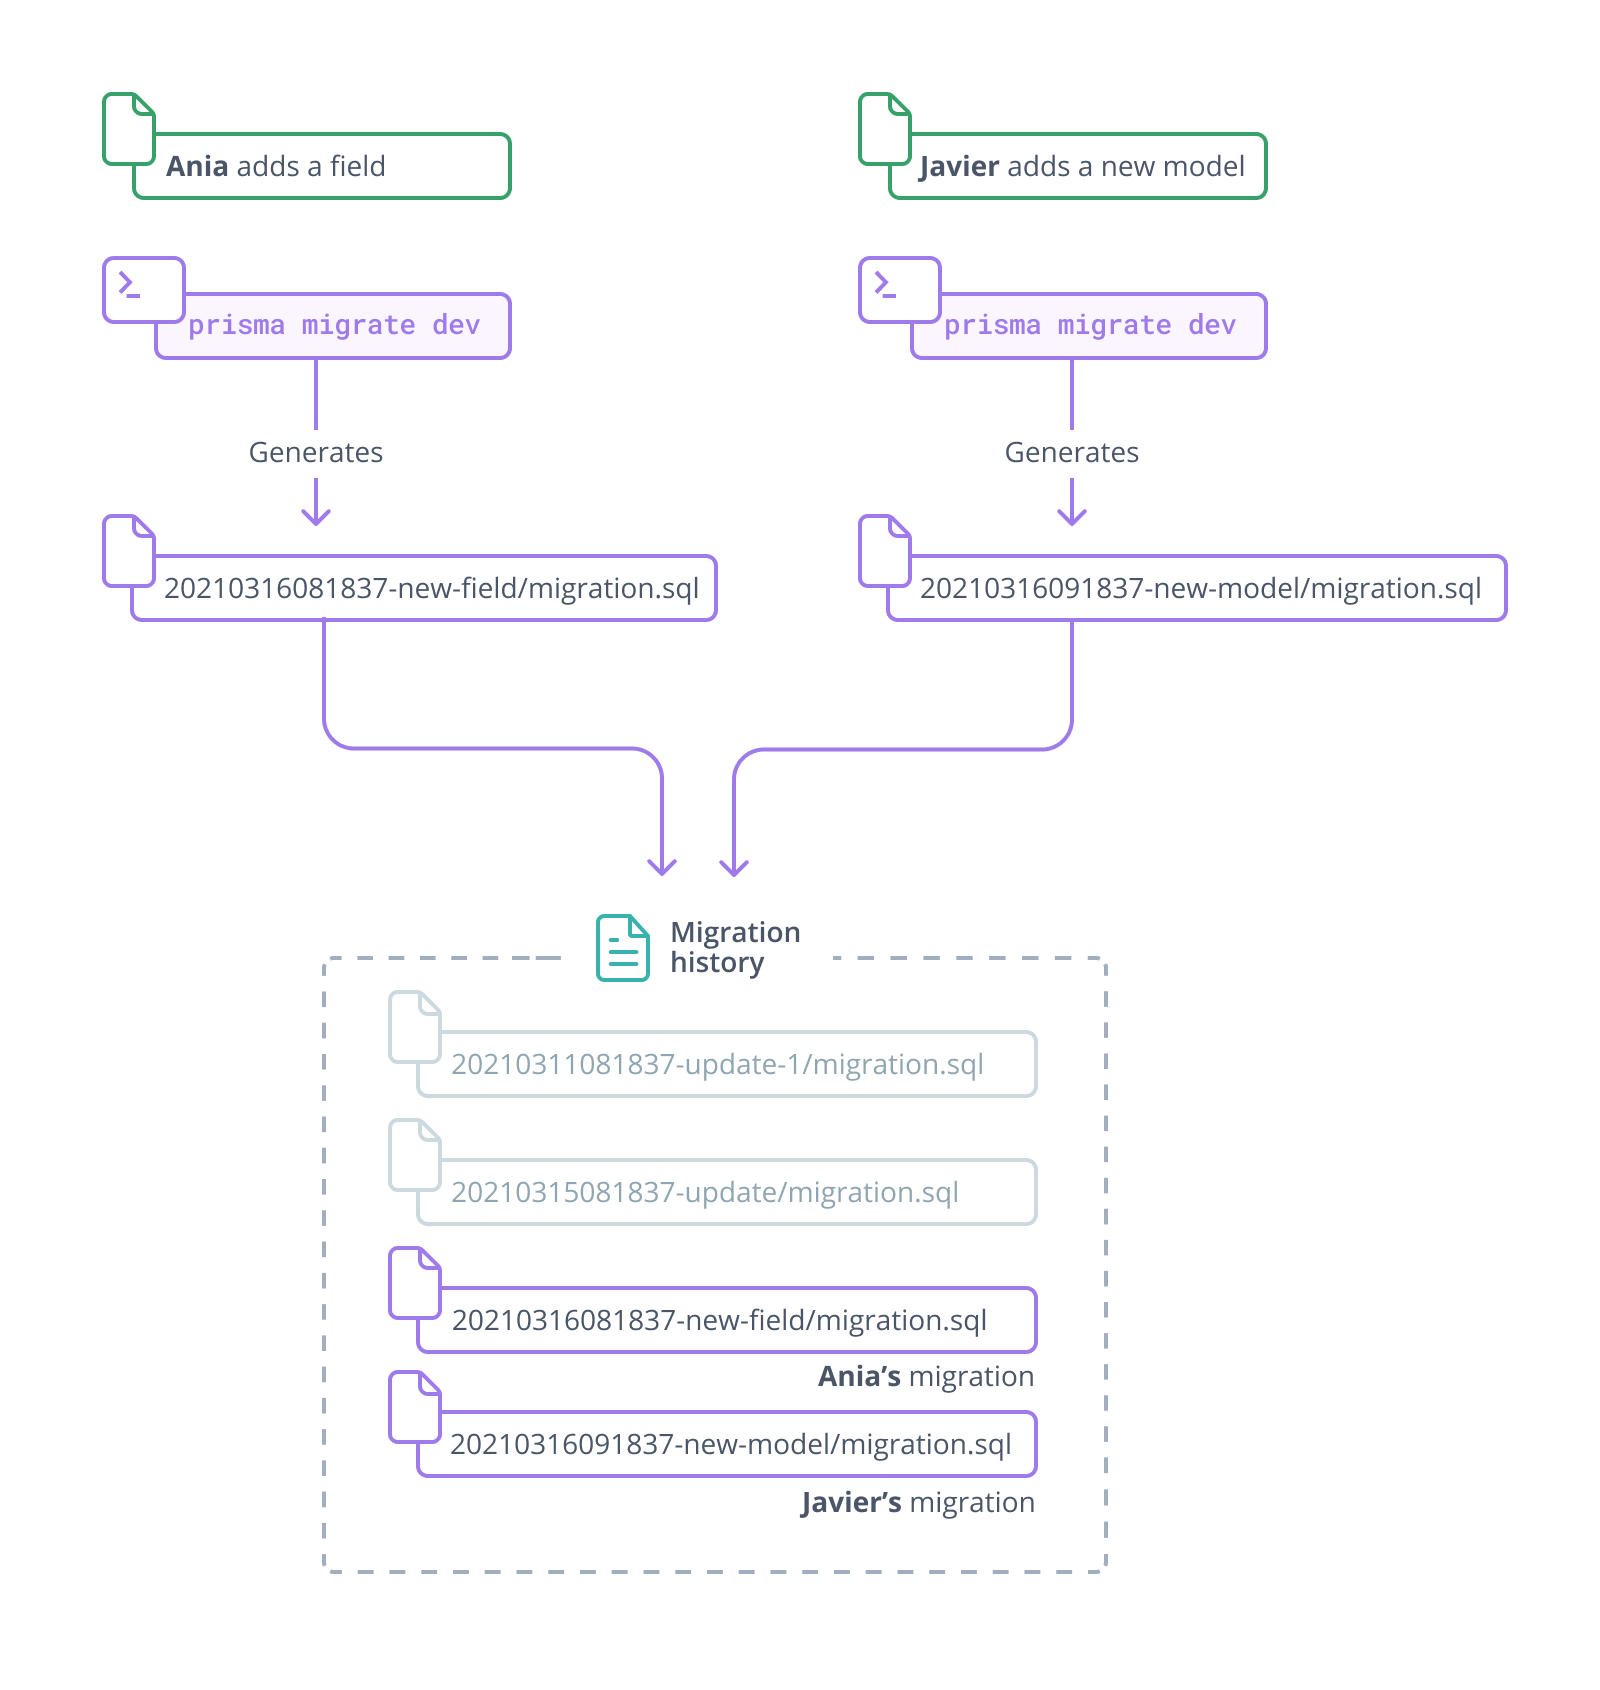
3.1. Developer A's changes
Ania adds a new field:
model User {
  /* ... */
  favoriteColor String?
}
And generates a migration:
npx prisma migrate dev --name new-field
3.2. Developer B's changes
Javier adds a new model:
model Tag {
  tagName     String   @id
  tagCategory Category
}
And generates a migration:
npx prisma migrate dev --name new-model
3.3. Merge changes
The migration history now has two new migrations:

4. Integrate your changes
4.1. Pull team changes
-
Pull the most recent changes:
- Two new migrations
- Updated schema file
-
Review the merged schema:
model User {
  /* ... */
  favoriteColor   String?
  bestPacmanScore Int?
}

model Tag {
  tagName     String   @id
  tagCategory Category
  posts       Post[]
}
4.2. Generate your migration
Run the migrate command:
npx prisma migrate dev
This will:
- Apply your team's migrations
- Create a new migration for your changes
- Apply your new migration
4.3. Commit changes
Commit:
- The merged
schema.prisma - Your new migration file
Next steps
Now that you understand team schema management, you can:
- Learn about customizing migrations
- Explore deployment workflows
For more information:
Stay connected with Prisma
Continue your Prisma journey by connecting with our active community. Stay informed, get involved, and collaborate with other developers:
- Follow us on X for announcements, live events and useful tips.
- Join our Discord to ask questions, talk to the community, and get active support through conversations.
- Subscribe on YouTube for tutorials, demos, and streams.
- Engage on GitHub by starring the repository, reporting issues, or contributing to an issue.